You can control what should be done with the files after batch printing: do nothing, move, copy, or delete. Print Conductor allows you to copy or move the source files to a user-defined folder or delete them when the batch print session is complete.
Set up post processing actions
To configure post processing actions, follow these steps:


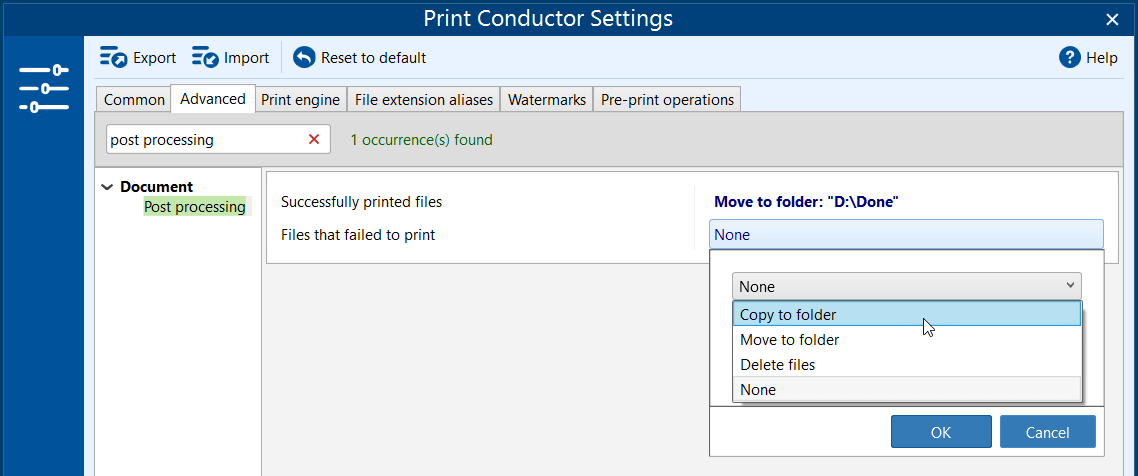
- Successfully printed files
- Files that failed to print
By default, no post-processing action is selected (None). Therefore, all your files will remain where they were before printing with Print Conductor. If you want to move them somewhere, you can do it as needed, using these four options:
- Copy to folder
- Move to folder
- Delete files
- None
Note
Please note that selecting the Delete files option will result in removing the files from your computer. They will be deleted without going to the Recycle Bin.
Automatically move source files to the original location after printing
With the Move to folder option selected, the program will transfer the source files to a specific folder immediately after printing. It can help track progress – you'll see which files have already been printed and which not.
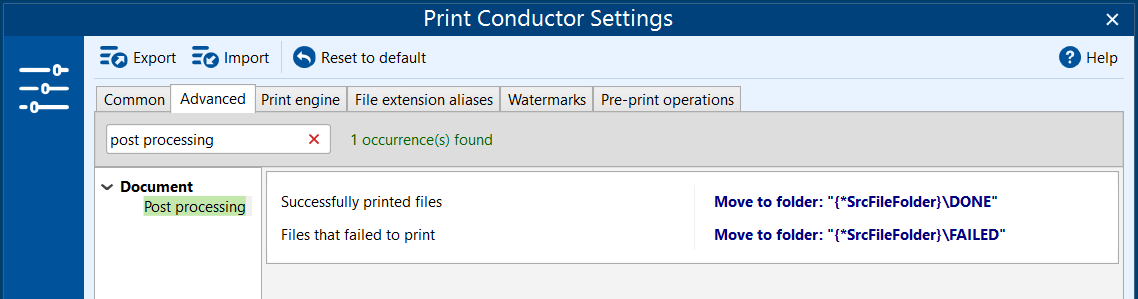
To minimize searching, you can organize finished files by moving them to the "Done" subfolder located in the same folder they were added from. To do it, use the {*SrcFileFolder} expression. For example:
| Setting | Path for Move to folder option |
| Successfully printed files | {*SrcFileFolder}\DONE |
| Files that failed to print | {*SrcFileFolder}\FAILED |
To automatically move files to the original folder:
- Go to Settings > Advanced;
- Find the Post processing section (start typing "post processing" in the search bar);
- Select Move to folder (or Copy to folder if you want to create copies);
- Enter folder path as in the example above;
- Click OK.
See also
How To
Get other useful guides on using Print Conductor and see many other useful how-tos, solutions, tips & tricks on effective batch printing. You'll find out how to import & export files, manage print lists, configure document and page settings, set up service pages, and so much more.