You can enumerate each printed copy using the Text watermark macros. After adding a small watermark at the bottom of each page, each copy will be numbered.
Contents
Watermark examples
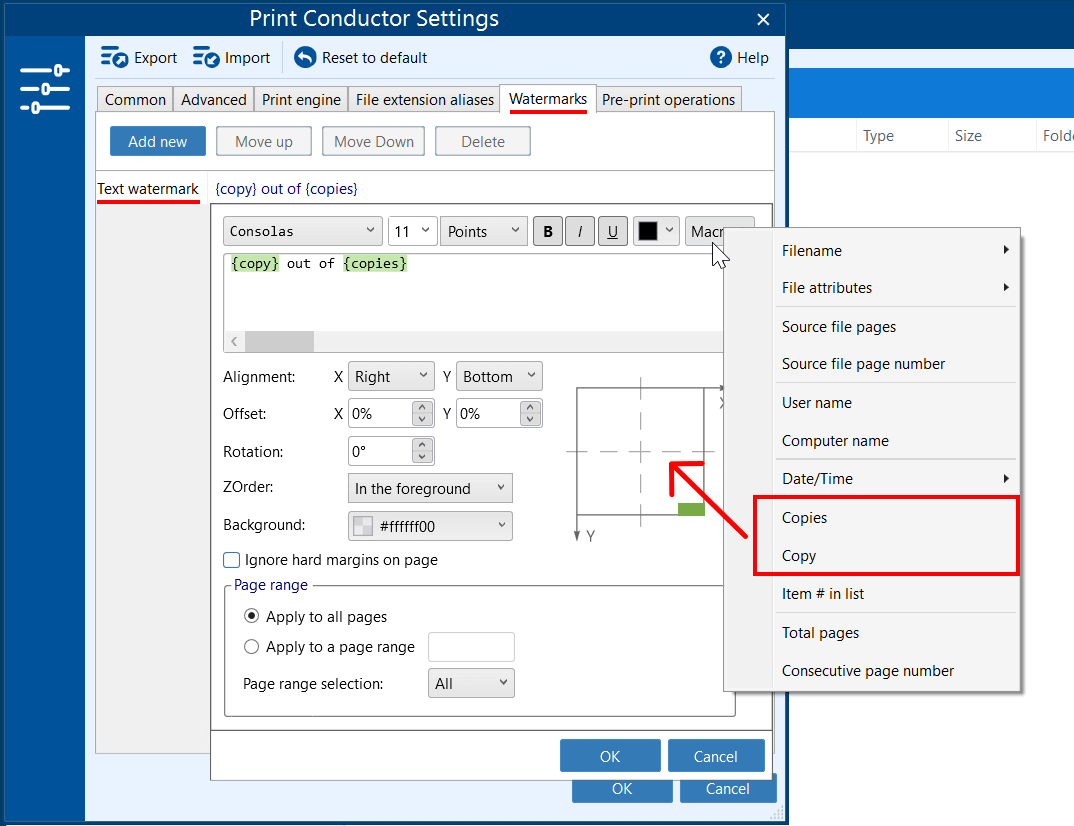
To add the number of the current copy, use the macro {copy}. You can combine it with some text or other macros to create a custom watermark that would suit your needs. You can add your own text ("out of") or symbols like "/", "|", "-". For example:
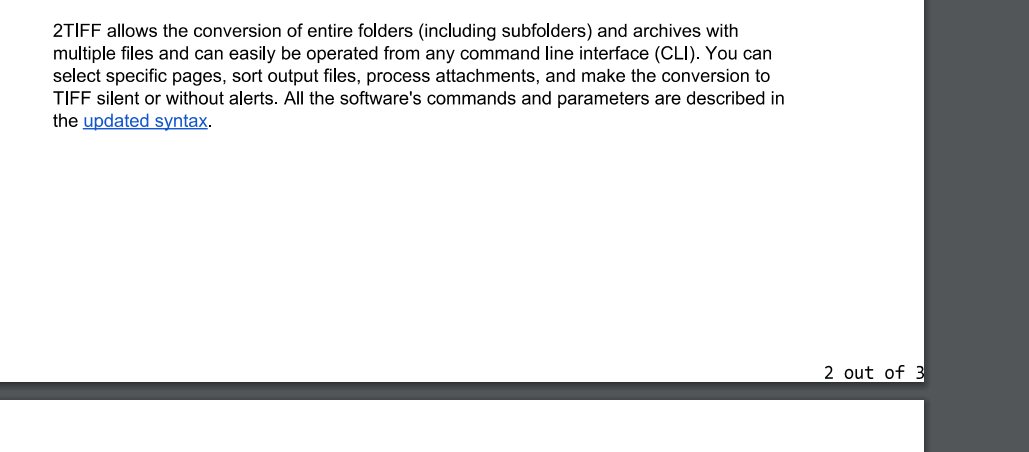
{copy} out of {copies}
– this text watermark will indicate the current copy and the total number of copies. You can also add the PC user's name from which the document was printed, like:
{user} || {copy} out of {copies}
To indicate the computer's name, use the macro {computer}. For example:
{computer} || {copy} out of {copies}
Therefore, you can combine the {copy} or {copies} macro with other macros that are available for the Text watermark.
See other macros and their descriptions →
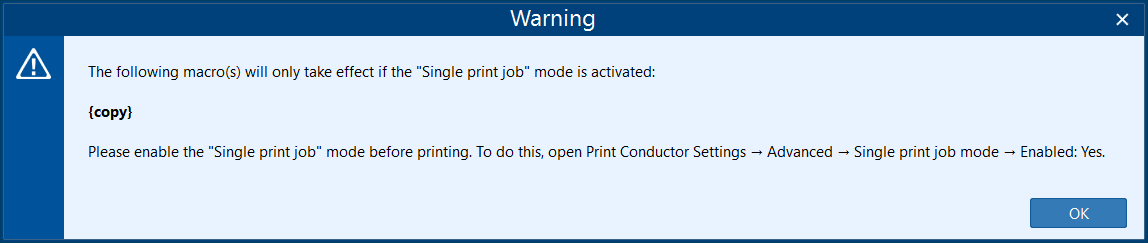
![]() Note: The {copy} and {copies} macros only work when the Single print job mode is enabled. If disabled, the program cannot count all the copies. The program will give you a warning, if it is not enabled.
Note: The {copy} and {copies} macros only work when the Single print job mode is enabled. If disabled, the program cannot count all the copies. The program will give you a warning, if it is not enabled.
How to add number of each copy to every printed page – step-by-step instruction
- Add the documents for printing and open Settings.
- Navigate to the Watermarks tab.
- Click on Add new → Text watermark.
- Enter the macro {copy} or a complex watermark, such as {copy} out of {copies}.
- (Optional) Combine the {copy} with other macros.
- (Optional) Adjust the size, position, page range, and other parameters for the Text watermark.
- Click OK to save and close the Text watermark settings.
- Click OK to save and close Print Conductor Settings.
- Start printing your documents.
You may also like to read:
How to print multiple copies of documents
See also:
How To
Get other useful guides on using Print Conductor and see many other useful how-tos, solutions, tips & tricks on effective batch printing. You'll find out how to import & export files, manage print lists, configure document and page settings, set up service pages, and so much more.