Are your documents getting mixed up after printing? Use cover pages.
A cover page is an extra sheet of paper that separates files after printing. When printing multiple large documents — say, several 50-page files — it can be difficult to tell where one document ends and another begins. To save time sorting through printouts, simply enable the cover page feature. It will insert either a blank sheet or a pre-defined cover page (using a template). After printing, you'll easily identify where each document or copy begins.
Skip ahead to:
- Cover page for documents
- Cover pages for folder
- Cover page Designer
- Change paper size for service pages
- Set paper source for service pages
- How to print cover pages only
- How to print cover page in the same print job with the document
- How to insert cover page on the same sheet of paper as the document
Cover page for documents
The cover page separates each new printed copy from the previous one. If your printer has more than one input tray, it's a good idea to print the "mainstream" of your documents with regular paper and print cover pages between them with colored paper. Cover pages should be distinctive; for example, you can use yellow or red paper sheets. This way, you'll easily distinguish between printed hard copies.
To enable cover page and select a template, go to Settings > Common > Service pages > Print cover page:
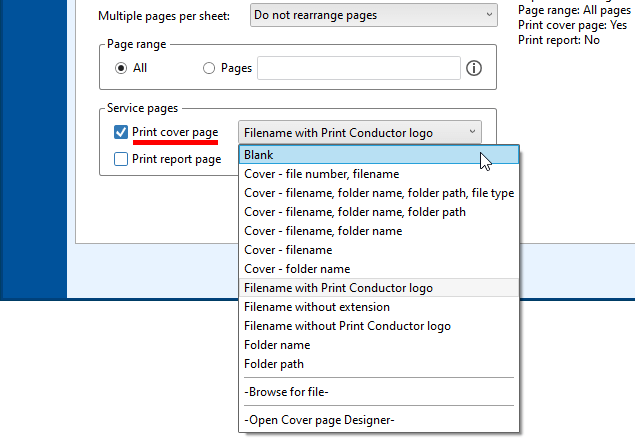
Cover page templates
You can select from several templates with different cover page layout:
- Blank
- Cover - filename, folder name, folder path, file type
- Cover - filename, folder name, folder path
- Cover - filename, folder name
- Cover - filename
- Filename with Print Conductor logo
- Filename without extension
- Filename without Print Conductor logo
- Folder name
- Folder path
- -Browse for file-
- -Open Cover page Designer-
These types include different variations of a filename or file's folder plus additional data and/or the Print Conductor logo – see how they look like below.

Blank page

Cover - filename, folder name, folder path, file type
![]()
Filename with Print Conductor logo (default template)

Filename without extension

Filename without Print Conductor logo

Folder name

Folder path
Insert a blank cover page
We usually recommend selecting the Blank option as a template. In this case, the cover page would be just a blank sheet of paper (which, by the way, is a great option to save ink and paper!).
Cover page between each document copy
Cover pages are inserted between the documents. For instance, you have two documents with copies in the List of Documents. By default, the cover page will go after document #1 (and all its copies) and before document #2 (and its copies if there are any).
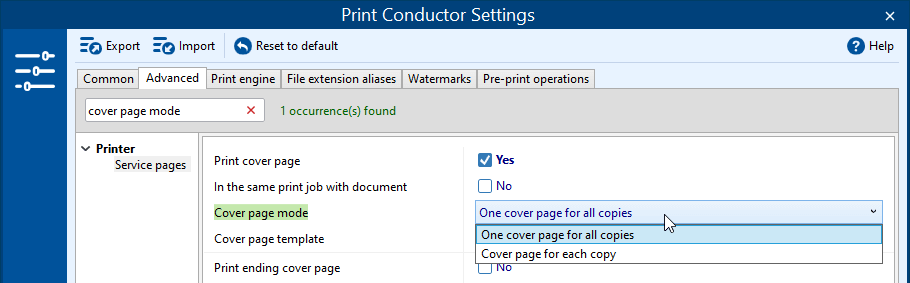
Additionally, you can set the program to insert a separation page per copy of each document – add a cover page between every copy. To do it, find the Cover page mode setting and select the Cover page for each copy option:
To insert a cover page:
- Go to Settings > Common;
- Check Print cover page;
- Go to Settings > Advanced;
- Find and select Cover page template;
- (optional) Select Cover page mode;
- (optional) Select Paper source for covers or Paper source for folder cover;
- Click OK.
Cover pages for folder
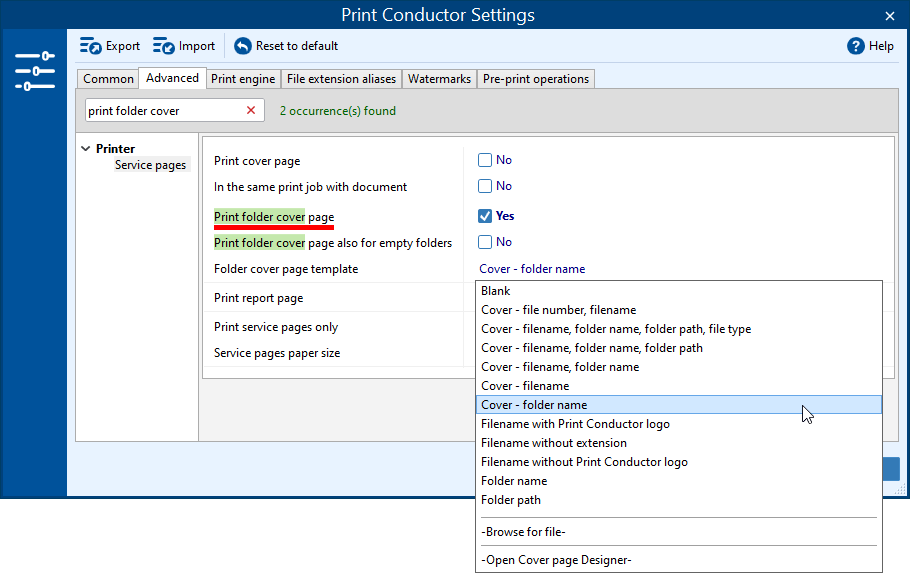
You can also specify a folder cover page. It is a cover page separating printed files located in different folders. With the Print folder cover page setting enabled, the program adds an extra cover page for each group of documents coming from a specific folder. Thus, you can easily distinguish files from different folders.
This feature works when files are:
- sorted by columns (unsorted) or
- sorted manually (moved up or down) or
- sorted by Folder path
If you've sorted List of Documents items by another column, the program will prompt you to sort items by Folder path first.
Folder cover page template
Besides, you can use a predefined template to set how the folder cover page will look like. You can define it by selecting a Folder cover page template. It has the same options as the regular cover page.
To insert a folder cover page:
- Go to Settings > Advanced;
- Find the Print folder cover page setting (start typing "print folder" in the search bar) and check it;
- Select Folder cover page template;
- (optional) Select Paper source for folder cover;
- Click OK.
Cover page Designer
For custom cover page, there's Cover page Designer that can be found in the list of cover page templates. So, if built-in cover pages don't meet your needs, you can create your own. With it, you can create and save your own cover page template consisting of customized text, images, barcodes or rectangles.
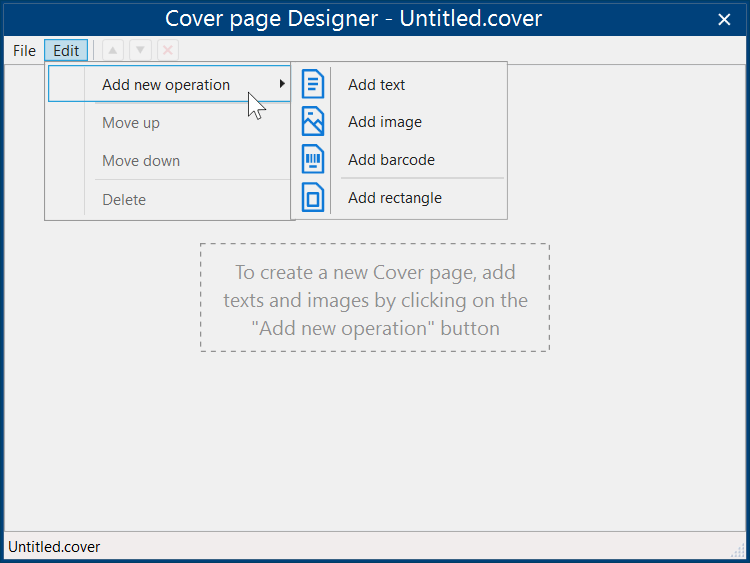
To create and use custom cover pages:
- Go to Settings > Common;
- Enable Print cover page;
- Click -Open Cover page Designer- in the list of templates;
- Select Edit > Add new operation, add and configure new elements;
- Click File > Save as to save your template;
- Confirm using the newly created .cover file as cover page template.
Cover page Designer can also be used to configure Cover page template / Ending cover page template (in the Advanced Settings).
Change paper size for service pages
For both cover and report pages, you can set paper size. Let's imagine: you have documents in Letter, Legal, and Tabloid format to print. However, the cover sheet is A4 paper by default, and your printing device doesn't have this option. In this case, just change the paper size for service pages to the one you like. This way, your report and cover pages will match the rest of the documents.
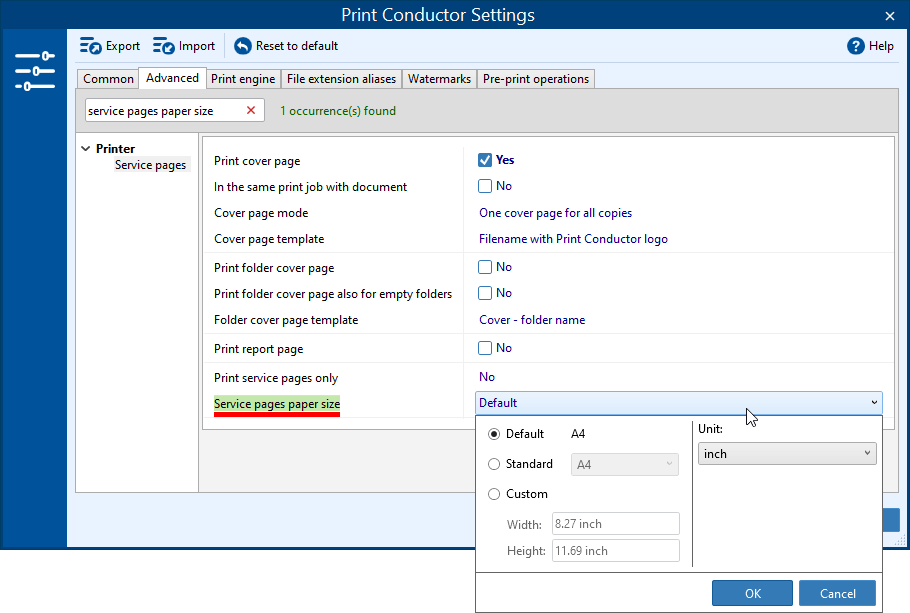
Using the Service pages paper size setting, you can select:
- Default (use the standard local paper size based on your printer or computer's system locale; e.g., A4 in Europe and Letter in the U.S.)
- Standard (select a pre-defined format)
- Custom (set any width x height in millimeters, centimeters or inches)
Note
Please note that changing paper size via Service pages paper size setting will affect both report pages and cover pages.
To adjust paper size for service pages:
- Go to Settings > Advanced;
- Find the Service pages paper size setting (start typing "service" in the search bar) and adjust it;
- Click OK.
Set paper source for service pages
1. Select paper source for cover pages
For cover pages, you can use the same printer tray as for document or have it pulled from a different tray. Using the Paper source for covers setting, select a certain paper source for your cover page. Possible options are: As in printer, Page size based, The same as for document. Alternatively, you can select an option that is provided by your printer.
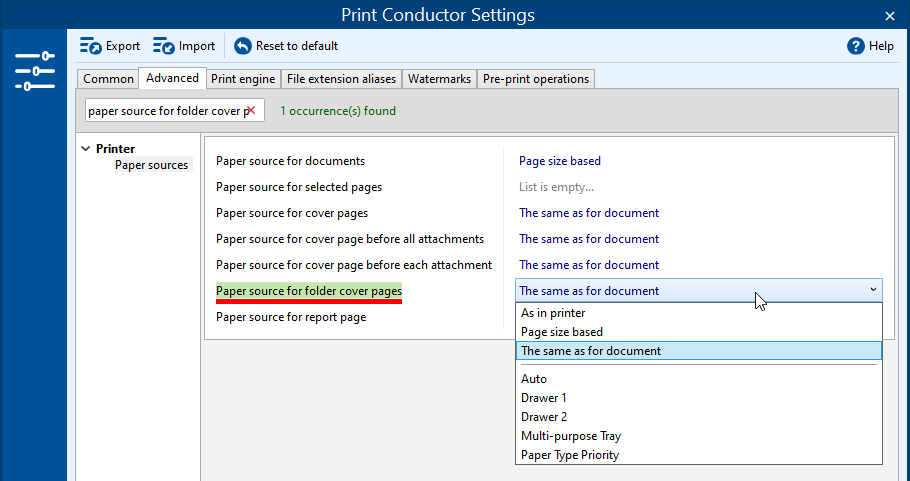
2. Set paper source for folder cover page
In the same way, you can select a paper source for the folder cover page. To do it, change the Paper source for folder cover pages option.
To select the input printer tray for service pages:
- Go to Settings > Advanced;
- Find the Paper sources section (start typing "paper source" in the search bar);
- Choose the necessary entry and select the desired option or a specific printer tray;
- Click OK.
How to print cover pages only
If you want to print only cover pages or report pages without the documents – it is also possible. Use the Print service pages only option:
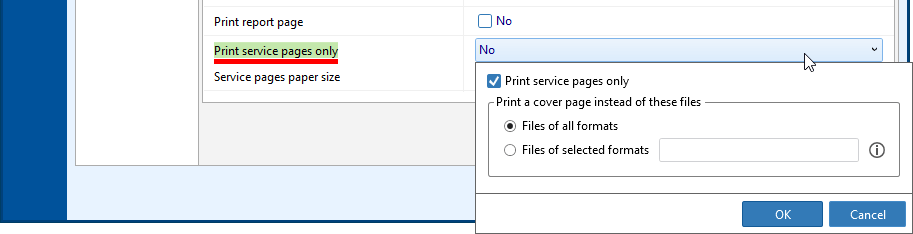
To enable this ability, go to Settings > Advanced, find the Service pages section and check the box next to Print service pages only.. You can also specify which file formats to consider when using this feature. For example, Files of selected formats: XLS, XLSX.
How to print cover page in the same print job with the document
If you want to staple the cover page that comes out along with its pertaining document, simply turn on the In the same print job with the document setting.
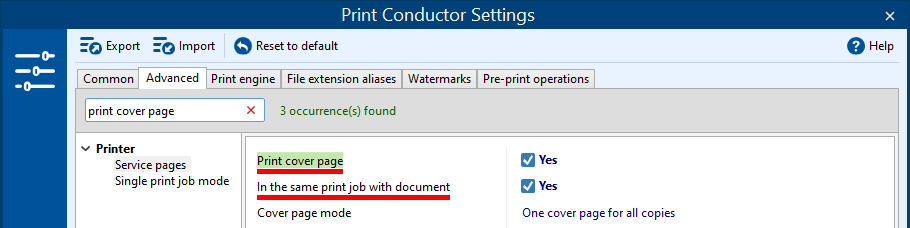
Besides, enabling this setting guarantees that the document is printed right after the cover page.
To print a document with its cover page:
- Go to Settings > Advanced;
- Find the Service pages section;
- Enable Print cover page;
- Enable In the same print job with the document;
- Click OK.
How to insert cover page on the same sheet of paper as the document
By default, the cover page is printed on a separate sheet of paper. But you may need to print the cover page on the same paper sheet as the beginning of the document, not as a separate page. To do it, use the settings below.
To print the cover page on the same paper as the document:
Use the combination of Advanced settings:
- Printer > Printing settings > Duplex mode: Long-edge binding;
- Printer > Single print job mode > Enabled: Yes;
- Printer > Single print job mode > Print extra blank even page in duplex mode: No;
- Printer > Service pages > Print cover page: Yes.
See also:
How To
Get other useful guides on using Print Conductor and see many other useful how-tos, solutions, tips & tricks on effective batch printing. You'll find out how to import & export files, manage print lists, configure document and page settings, set up service pages, and so much more.