Print Conductor offers built-in operations that can be optionally utilized before the document printing process starts. These operations will apply to all items added to the List of Documents.
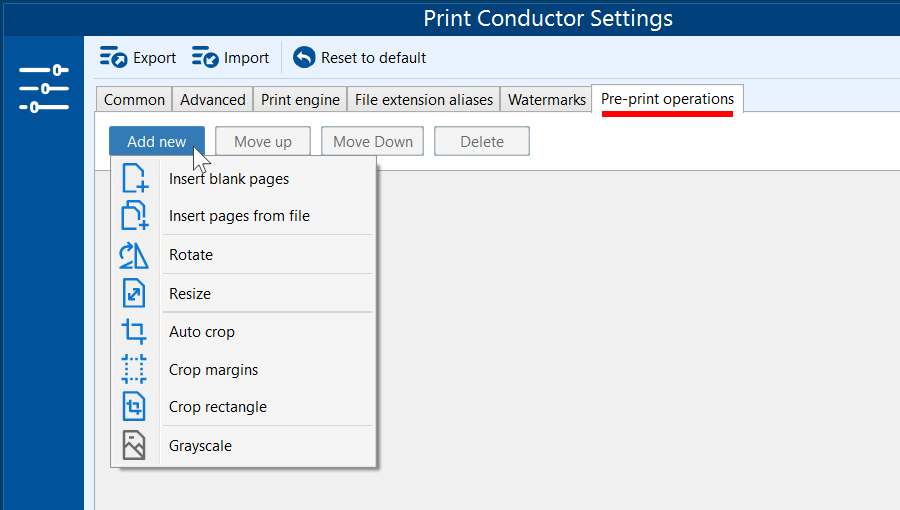
 Insert blank pages
The Insert blank pages operation lets you add blank pages within a document. Specify the page number after which you want to insert the blank pages (Page range) and the number of pages you want to add (Number of blank pages to insert).
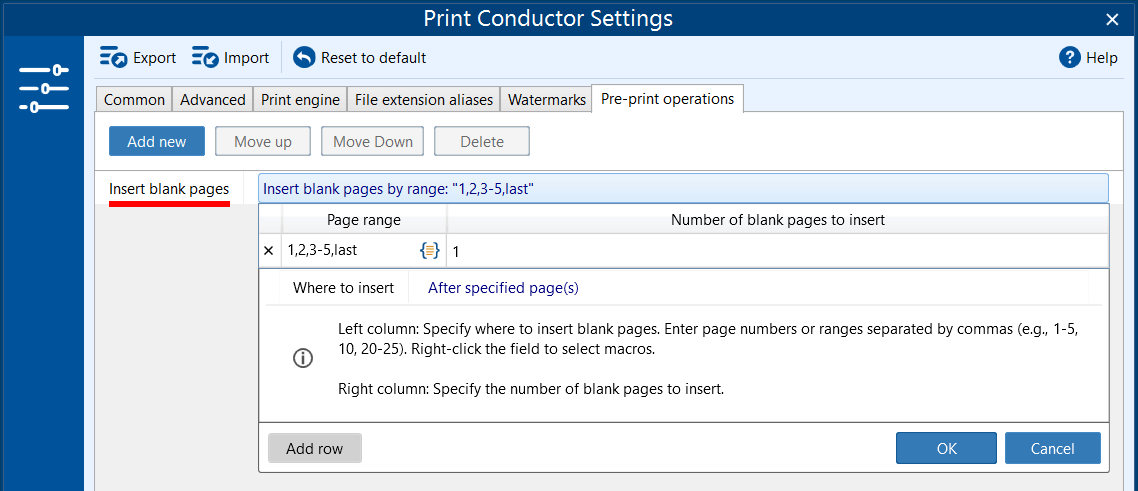
When specifying Page range, you may adjust blank page placement by using built-in macros. Use them by clicking the {=} icon:
| Macro name | Macro syntax | Description |
|---|---|---|
| Insert after every 'N' pages | {Every(N)} | Inserts the specified file at a recurring interval. For example, replacing N with 5 will command the engine to insert a separator sheet after pages 5, 10, 15, and so on. |
| Before Bookmarks | {Bookmarks} | Scans the PDF metadata outline and triggers a file insertion immediately prior to any page anchored by a bookmark. |
| Last page | last | Inserts the file relative to the absolute end of the document sequence. |
| Second page from the end, Third page from the end, etc. | Last1, last2, last3 | Utilizes reverse syntax to offset the insertion point by the corresponding number of pages from the end of the document. |
![]() Did you know that besides inserting, you can also automatically remove blank pages if they're not needed? Make use of the Disable printing blank pages feature.
Did you know that besides inserting, you can also automatically remove blank pages if they're not needed? Make use of the Disable printing blank pages feature.
Insert pages from another file
The Insert pages from another file operation lets you add a user-specified file to the print stream, allowing you to customize the output to your exact needs. By clicking the Macro button ({=}), you can define where the file will be inserted within the printed document. The orange folder icon lets you browse for and select the custom file, which can be a PDF, PNG, JPG, HTML, or a .cover file.
To set File path for the file you want to insert, either enter the full file path manually or click the Browse button (the orange folder icon) to select it.
To define the file position (Page range), you can enter a page number or page range manually, or right-click in the left column and select the required macro from the Page range macros list.
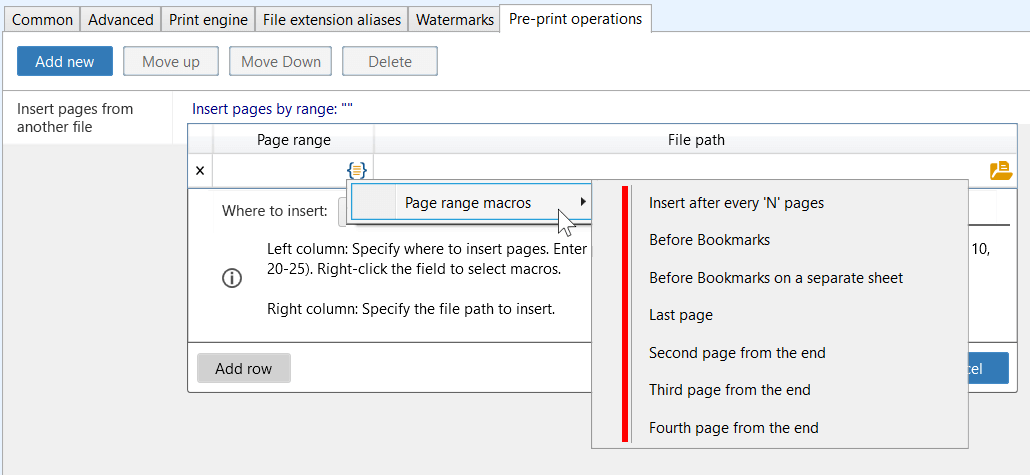
Description of available macros:
| Macro name | Macro syntax | Description |
|---|---|---|
| Insert after every 'N' pages | {Every(N)} | Inserts the specified file at a recurring interval. For example, replacing N with 5 will command the engine to insert a separator sheet after pages 5, 10, 15, and so on. |
| Before Bookmarks | {Bookmarks} | Scans the PDF metadata outline and triggers a file insertion immediately prior to any page anchored by a bookmark node. Ideal for single-sided (simplex) printing. |
| Before Bookmarks, on a separate sheet | {Bookmarks(duplex)} | Designed specifically for double-sided (duplex) printing. Calculates the page count of the preceding section and injects a blank page if necessary to ensure the separator prints on a new physical sheet. |
| Last page | last | Inserts the file relative to the absolute end of the document sequence. |
| Second page from the end, etc. | Last1, last2, last3 | Utilizes reverse syntax to offset the insertion point by the corresponding number of pages from the end of the document. |
Related use case:
How to insert cover pages between bookmark sections of a multi-page PDF document →
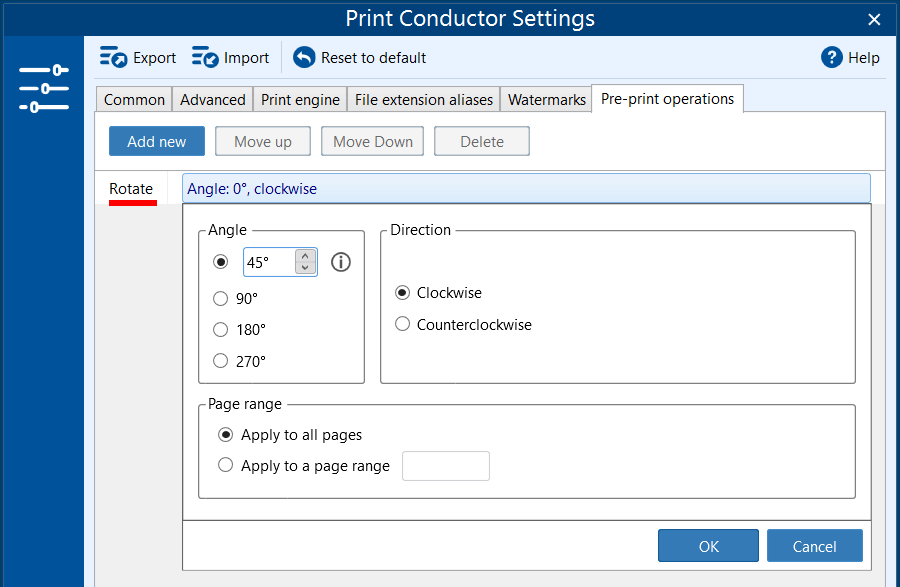
Rotate
The Rotate operation allows you to configure automatic page or image rotation before printing. Users can specify:
- Angle of rotation: Choose from 45°, 90°, 180°, or 270°.
- Rotation Direction: Clockwise or counterclockwise.
- Page range: Apply the rotation to all pages or only a specific range.
Once configured, the rotation settings are applied automatically during the printing process.
Resize
 Resize
The Resize operation helps ensure that printed output fits specific dimensions or layout requirements.
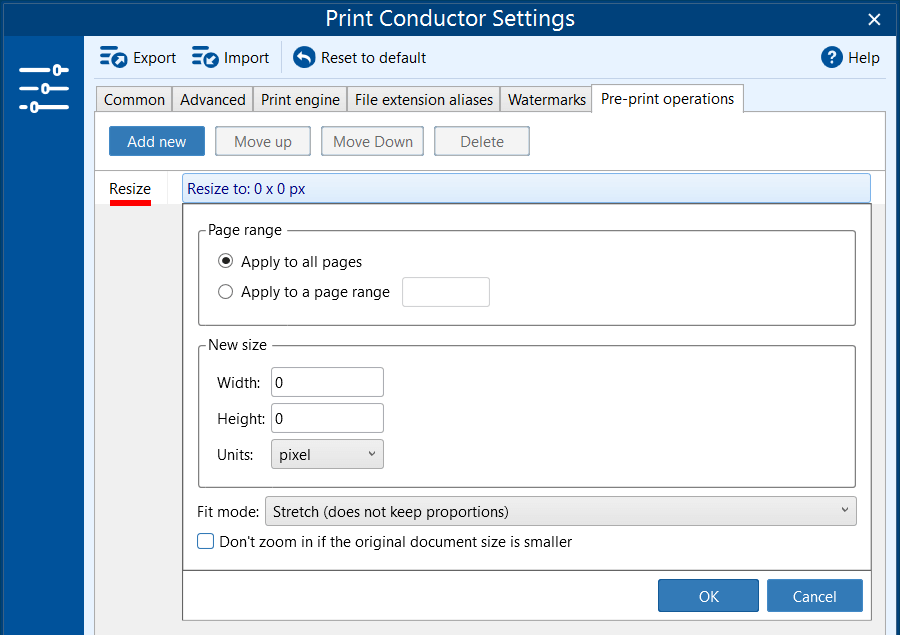
You can configure:
- Page range: Apply resizing to all pages or only a specific page range.
- New size: Set the desired width and height, and choose the measurement units (e.g., pixels).
- Fit mode: Define how the content is resized (e.g., Stretch without keeping proportions). Options include:
- Stretch (does not keep proportions)
- Fit in rectangle
- Thumbnail (fit rectangle and fill color)
- Fit width
- Fit height
- Fill in rectangle
- Zoom settings: An option Don't zoom if the original document size is smaller prevents upscaling if the original document is smaller than the new size.
The configured resize settings are applied automatically before printing.
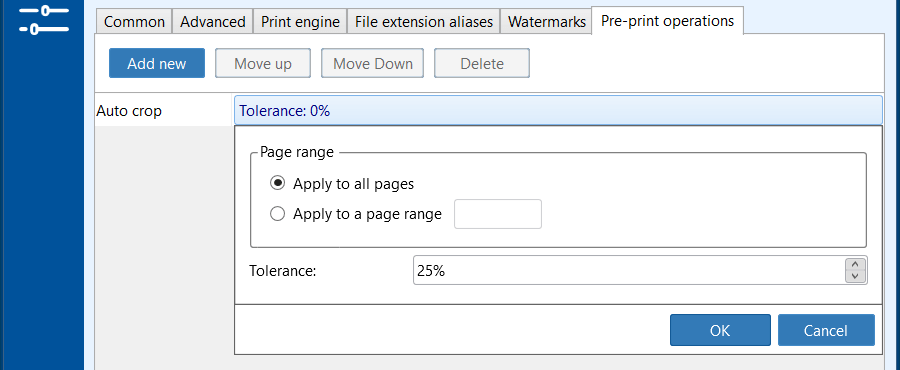
Auto crop
The Auto crop operation automatically trims blank (white) margins from document pages or images. A high Tolerance value enables less strict definition of white. Experiment with this setting to achieve optimal results.
Besides, the Apply to a page range option allows you to apply the operation to specific pages or page ranges exclusively.
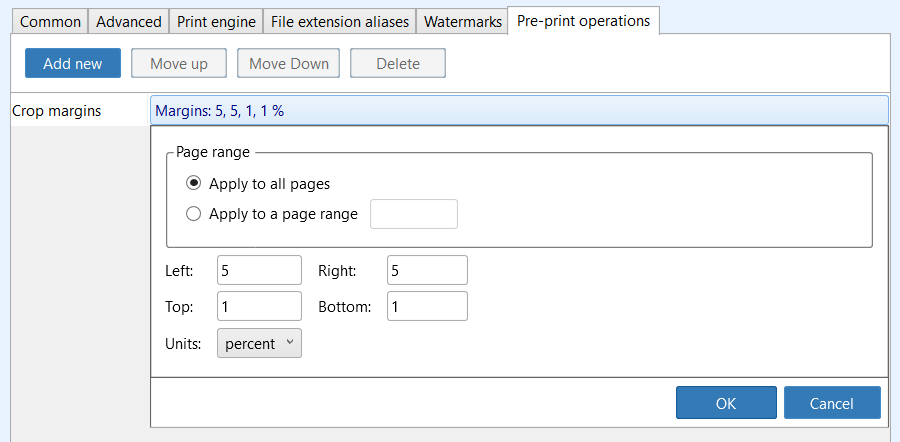
Crop margins
The Crop margins operation allows for image/page cropping based on customizable margins. You must manually input the indents (Left, Right, Top, Bottom) for the program to crop your files.
In addition, you can define a Page range to apply this operation to specific pages or page ranges. Input page numbers and/or ranges next to Apply to a page range, separated by commas. For example: 1,3,5-10.
Crop rectangle
The Crop rectangle operation trims the image or page within a customizable rectangle's boundaries. You can adjust the rectangle's width (Width), height (Height), and indents from the left side (Left) and top (Top) of the page or image.
Additionally, you can specify the Page range to apply this operation to select pages or page ranges. For example: 1,3,5-10

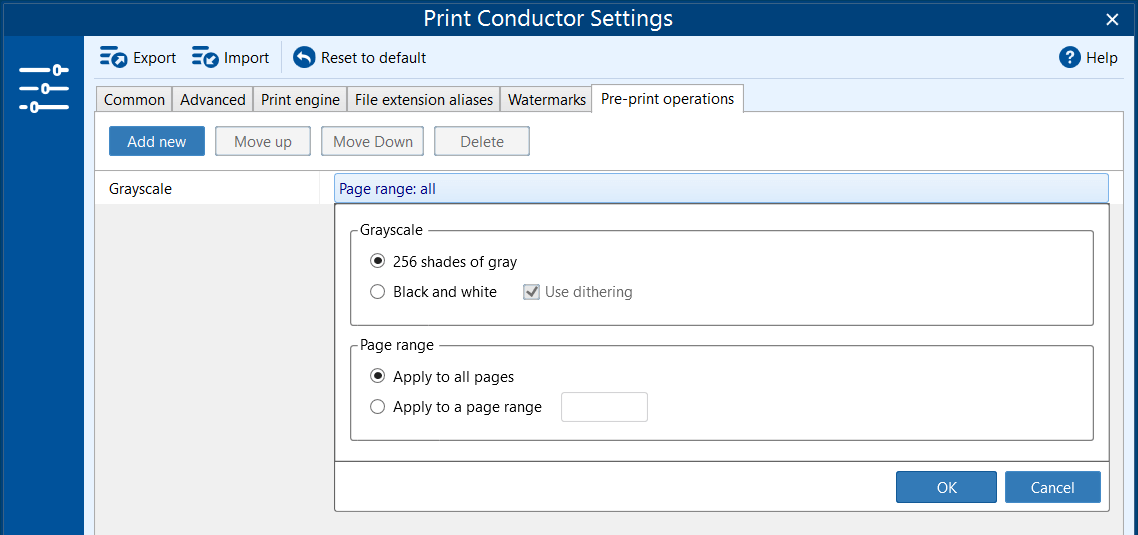
Grayscale
 Grayscale
The Grayscale pre-print operation converts printed documents to grayscale before they are sent to the printer. This operation is useful when you need to reduce color ink or toner usage, ensure consistent black-and-white output, or meet specific printing requirements.
You can choose between two grayscale modes:
- 256 shades of gray – preserves smooth gradients and detailed grayscale tones.
- Black and white – converts the document to pure black and white; optionally, dithering can be applied to simulate gray tones using dot patterns.
You can also control where the operation is applied:
- Apply to all pages – converts the entire document to grayscale.
- Apply to a page range – converts only the specified pages.
This operation is performed during the pre-print stage, ensuring the document is processed in grayscale regardless of the printer’s color settings.
You may also like to read about:
Need help with configuration? Please contact us.